Posts Tagged ‘ricotta’

Crustless Pumpkin Ricotta Cheesecakes

Crustless Pumpkin Ricotta Cheesecakes

Hello! Sorry it’s been a few days, things in my personal life got overwhelming this weekend and I needed to deal with that.

But, as promised, tasty pumpkin dessert using the ricotta we made! I sort of combined a bunch of different recipes I was looking at for inspiration and came out with this. It’s a total experiment and probably could use some revision, but for now…

Crustless Pumpkin Ricotta Cheesecake – Take 2

Ingredients:

  • 2 cups of that tasty homemade ricotta  (if you can let it sit out for awhile to soften up that’s very helpful)
  • 2 tablespoons dark brown sugar (or light brown, whatever you have)
  • 1/4 cup of maple syrup – grade B is probably best, but I only had grade A on hand
  • 1/4 cup of honey – I used my local honey which tends to be pretty sweet. If you don’t have both honey and maple syrup use just 1/2 a cup of one of them.
  • heaping 1/2 cup of pureed pumpkin – I used the canned kind (NOT pumpkin pie mix, just solid-pack pumpkin)
  • 3/4 cup of heavy cream – depending on how your ricotta came out, if it’s on the drier side, use a bit more heavy cream, if it’s on the wetter side use a little less. The first time I made this my ricotta was very dry which is why I added the cream, this time though my ricotta was pretty wet/creamy
  • 1/4 teaspoon ground nutmeg
  • 1/2 teaspoon cinnamon
  • 1 level teaspoon of ground ginger
  • 1/2 teaspoon ground allspice
  • 1/2 teaspoon vanilla extract (optional)
  • 1 egg

Instructions:

  1. Preheat oven to 350 degrees.
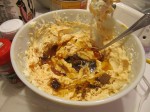
  2. In a bowl, blend together the ricotta and heavy cream, add in the pumpkin. Mix in the brown sugar.

    Add brown sugar to the ricotta, heavy cream, pumpkin mix.

  3. Mix in the honey/maple combination and vanilla (if you choose to use it).

    Add in the maple syrup/honey mixture and vanilla.

  4. Mix in all the spices – nutmeg, cinnamon, ginger, allspice. I probably put in a little bit more cinnamon because I really like cinnamon, so feel free to change the amounts of spices to your taste. Experimentation is fun! At this point, it will have a kind of whipped frosting like consistency (you may notice whipped peaks) and because there is no egg or flour or anything in it you can use it as a whipped frosting (taste it! it’s delicious)! I imagine this would be great on some kind of autumn/wintery spiced muffin or spiced cake. Or dolloped into a rich and cream squash soup. But, if you’d like to continue on with making a cheesecake-like dish, proceed!

    Mix in the ginger, nutmeg, cinnamon, and allspice.

  5. Blend in the egg. You’ll notice the consistency change.

    Southtown Farms - the only place I'll buy my eggs from these days. Check out the link to their facebook page at the end of this post, or find him at the Ramsey Farmers Market on Sundays!

    Look at how beautiful the eggs are! Can't go back to store-bought after getting used to these tasty eggs!

    Blend in the egg. Notice the whipped frosting-like consistency of the mixture before the egg gets blended in.

    Change in consistency once the egg is added.

  6. I had 6 ramekins, and this time also used a Corningware dish to see what would happen with a larger quantity being baked in the oven. I imagine you could also just use a glass pie dish. So I filled the ramekins and corningware dish halfway (sometimes a little less). I noticed the first time I made this that they puff up in the oven and kind of look like they’re breathing, then afterwards when taken out and let to cool they go back down.

    Fill ramekins about halfway.

  7. When I first made these I don’t feel like I baked them for as long as it took this time (the first time I made them I also put them on the middle rack in the oven – for the record, the first time I also didn’t write anything down). But, this time I tracked the time and it took about 20 minutes for them in the oven (I baked them for a little longer than I thought they needed, used that old toothpick in the center trick but who knows if that means anything here). You can eat them warm, but I noticed that I liked them better the next day after they were refrigerated. Try them both ways! Just make sure to cover the ramekins/baking dish with foil or plastic wrap so they don’t get all stale-like.

    During bake time you'll notice they start to puff up.

    Right as they come out of the oven.

    After they've cooled, they fall down from their puffiness.

These little desserts are pretty rich, so although the amount made in the ramekins may look like very little I find that it’s about all one can eat before it becomes too much. Try drizzling a little maple syrup on top for a little extra sweetness (though I don’t think it needs it!). My family-friend/cousin is a pastry chef and I’m sure she could tell me everything I did wrong and enlighten me on what I should do next time, so for TAKE 3 I will consult with her.

Want to buy the freshest eggs you’ll ever have? Visit Southtown Farms facebook page for more information! Farmer Matt knows what he’s doin’ pasturing those hens! Pastured chicken eggs are healthier for you and for the chickens. Less cholesterol, the proper ratio of omegas for the human body (a more even balance of omega-6 fatty acids to omega-3 fatty acids, currently the majority of the population is consuming unhealthy, high levels of omega-6’s, and not enough omega-3’s). Eggs raised on pasture have 4-6 times more the amount of vitamin D than your mediocre supermarket egg. In addition, they have more vitamin A, vitamin E, and seven times more beta-carotene. So, I highly recommend pastured eggs – and THEY TASTE BETTER!

Southtown Farms: https://www.facebook.com/southtownfarms

Pastured egg information: http://www.motherearthnews.com/Real-Food/2007-10-01/Tests-Reveal-Healthier-Eggs.aspx

I will be doing a post on pastured chickens, backyard flocks and more in the future!

Beast,

Erica

Homemade Ricotta

Homemade ricotta

Good evening, everyone! Today has been a great day for this blog because we got a TON of page views. Thanks everyone for checking out Meatbeasta, and I hope you continue to do so! Spread the meatbeastalove to all your friends and tell them to check this blog out as well!

But, back to the food (that’s what we really love anyway, right?)…

Tonight, I made ricotta. Not something new, I’ve been doing this for about a month now. First time I made it was with one of the honorary Bacon Boys (of my fictional band “Meatbeasta and the Bacon Boys”) Rob. He saw this recipe on Food Network (Anne Burrell) and I was interested, so we did it together. Well, let me tell you, one taste of this homemade ricotta and I haven’t bought the store stuff since. Nothing beats the creaminess of it. Growing up I used to mix a sugar into a little cold ricotta and eat it like a dessert – this homemade ricotta doesn’t even need the sugar, it’s like a dessert by itself! You can eat it warm or cold and treat it like you would the store-bought stuff. I still like to sweeten it up for a little after-dinner dessert every now and then but these days I will drizzle some local honey I bought at the Ringwood Farmers Market from Nina’s Red Barn Farm, or some maple syrup (Grade B is my favorite!). When you do this it becomes a REAL dessert. Mix in some strawberries. Mouth. Watering. However, tonight I made it in preparation for this dessert I made up last week which my sister has been bugging me to make again. I’m hoping to get to it tomorrow and post it up for you guys.

Anyway, without further ado…

Homemade Ricotta – Anne Burrell (http://www.foodnetwork.com/recipes/anne-burrell/homemade-ricotta-recipe/index.html)

Prep Time: 5 minutes

Inactive Time: 15 minutes

Cook Time: 10 minutes

Makes: 4-6 servings (depends on what you call a serving though)

Ingredients:

  • 6 cups whole milk (I prefer to use an organic variety, if you’ve got the bucks grass-fed cows are even better!)
  • 2 cups heavy cream (same comment as with the milk)
  • 3 tablespoons distilled white vinegar
  • 1 teaspoon kosher salt

Instructions:

  1. In a medium saucepan, combine milk, heavy cream, vinegar and salt.
  2. Place saucepan over medium heat and slowly bring to a simmer. Simmer the milk mixture for 1 to 2 minutes, you will see curds begin to form. I found that this took little longer than she made it seem for the simmer to happen, but that once the milk starts to curdle it happens pretty quickly so keep an eye on it. Last time I made this I cooked it too long and my ricotta was on the dry side. However, too little isn’t good either.

    Curds and whey still in pot.

  3. Line a mesh strainer with several layers of damp cheesecloth.
  4. Gently pour the curds and whey through into the strainer and let drain for 15 minutes-ish (maybe less, maybe more, you’ll figure it out). Be sure to check the level of the whey in the bowl and make sure it’s not high enough that the ricotta is just sitting in it. If so, pour whey into another bowl to allow room for the curds to continue draining.

    Whey draining from the curds.

  5. Gather the cheesecloth together and gently squeeze some of the excess liquid from the ricotta.

    Gently squeeze excess whey through cheesecloth.

    I actually had to drain it a second time with a piece of muslin. I didn't layer enough cheesecloth so the ricotta was coming through the holes in the cheesecloth. This ensured just liquid would come out for a second draining.

  6. Finally, this isn’t an Anne Burrell instruction, this is a Meatbeasta instruction: DO NOT DUMP THE EXCESS LIQUID! That is WHEY! Whey has a wide variety of uses and has a ton of its own redeeming qualities. Put it aside and I’ll tell you more about what you can do with whey in the next blog post.

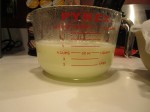
    Whey!

So, that’s ricotta. Notice how I have not once called this substance cheese. That’s because (surprise!) it’s technically not a cheese. According to our friends over at Wikipedia “ricotta is not properly a cheese because it is not produced by coagulation of casein. Rather it is made by coagulating other milk proteins, notably albumin and globulin, left over in the whey that separates from the milk during the production of cheese. In fact, ricotta is safely eaten by individuals with casein intolerence.” Thanks, Wikipedia!

Ricotta can be made from the milk of cows, sheep, goats, or even water buffalo (who has a water buffalo?). So for those of you unable to drink cow’s milk but can digest goat’s milk, the recipe is pretty much the same. Just be sure to use whole goat’s milk in place of both the milk and heavy cream.

It’s super easy to make and tastes a million times better! Stay tuned for the next post about ricotta’s by-product brother.